Check out this Youtube video: Learn how to remove and replace recessed LED lights with easy step-by-step instructions to upgrade your lighting at home.

Contents
- 1 Assessing the Fixture
- 2 Removing the Trim
- 3 Disconnecting the Wiring
- 4 Removing the Housing
- 5 Checking for Damage
- 5.1 Signs of Water Damage
- 5.2 Detecting Structural Issues
- 5.3 Assessing Electrical Components
- 5.4 Preparing for the Installation of a New Fixture
- 5.5 Clearing Debris and Obstructions
- 5.6 Shutting Off the Power Supply
- 5.7 Gathering Necessary Tools and Materials
- 5.8 Securing the Workspace
- 5.9 Final Checks and Preparations
- 6 Frequently Asked Questions
Assessing the Fixture
When assessing the fixture, it is crucial to identify the type of recessed lighting installed, such as baffle trims, open trims, reflector trims, wall wash trims, and adjustable trims. Each type serves a specific purpose, from reducing glare to directing light in a particular direction. Identifying the specific type of recessed lighting will dictate the removal process and ensure the correct replacement fixture is installed.
Check the type of recessed lighting
When assessing the fixture, it’s crucial to identify the type of recessed lighting installed. The various types include baffle trims, open trims, reflector trims, wall wash trims, and adjustable trims. Each type serves a specific purpose, from reducing glare to directing light in a particular direction. Identifying the specific type of recessed lighting will dictate the removal process and ensure the correct replacement fixture is installed.
Turn off the power source
Prior to attempting any work on the recessed lighting fixture, it is imperative to turn off the power source. This action significantly minimizes the risk of electric shock or injury while handling the fixture. It is recommended to switch off the power directly at the circuit breaker to ensure complete electrical isolation. Using a non-contact voltage tester can also provide an added layer of safety by confirming that the power has been successfully cut off before initiating any removal or replacement procedures.
Removing the Trim
Loosening the clips
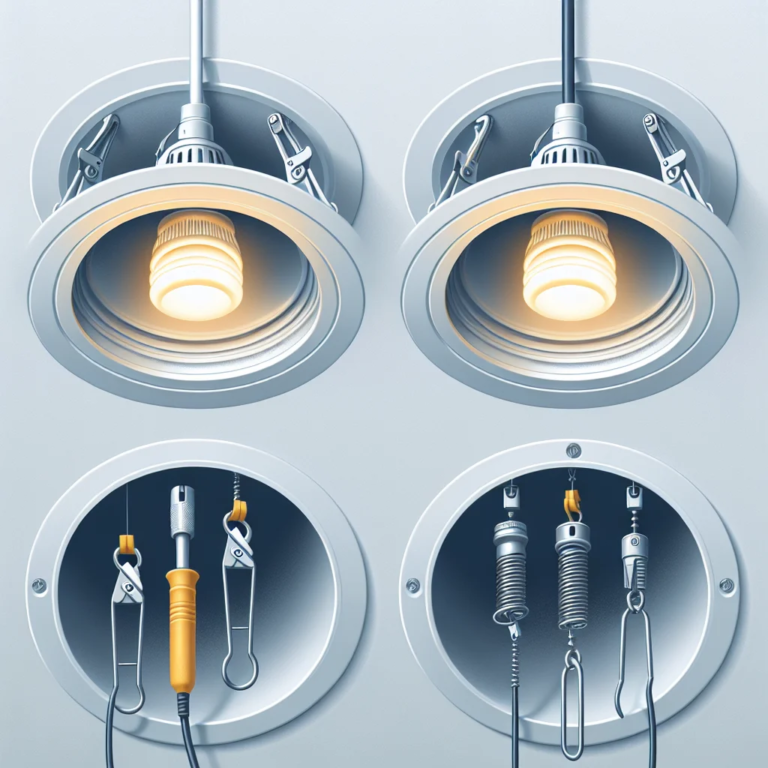
To effectively remove recessed ceiling lights, the first step is to loosen the clips holding the trim in place. Using a flathead screwdriver or a trim removal tool, gently insert the tool between the trim and the ceiling to disengage the clips.
Apply even pressure and work your way around the entire circumference of the trim, taking care not to damage the ceiling or the fixture.
Working the trim out of the ceiling
Once the clips are loosened, carefully work the trim out of the ceiling by gently twisting and pulling it downward. Be cautious not to force the trim out, as this could lead to breakage or damage.
If the trim is stuck, double-check that all the clips are fully disengaged before proceeding. Once the trim is free, disconnect any wiring if necessary and set it aside safely for reinstallation or replacement.
Disconnecting the Wiring
Identifying the wiring To identify the wiring for removing recessed ceiling lights, you need to first turn off the power at the circuit breaker. Use a voltage tester to make sure the power is indeed switched off before proceeding. Once confirmed, identify the wiring connections, typically comprising black (hot), white (neutral), and green or bare copper (ground) wires. Safely differentiate between the wires and take note of their placements.
Disconnecting the wiring safely Before disconnecting the wiring, it’s crucial to mark each wire with tape and label them for easy reconnection later. Using a wire stripper, carefully strip the wire ends to expose a small portion of the copper wire. Loosen the wire connectors or screws connecting the wires and disconnect them. Exercise caution and avoid tugging on the wires when separating them. Once the wires are disconnected, it’s recommended to cap each wire end with wire nuts to prevent any accidental contact with live wires.
Removing the Housing
To remove the housing from the ceiling, first, turn off the power supply to the fixture. Then, locate and remove any screws or clips securing it in place. Slowly and carefully pull the housing down from the ceiling while supporting the weight to avoid damaging the ceiling. Yes, it is important to take precautions to avoid damaging the ceiling during the removal process. Use a flathead screwdriver or a small pry bar to gently separate the housing from the ceiling material, and ensure a smooth removal by easing the housing away from the ceiling. Be diligent in checking for any signs of damage during and after the housing removal to ensure the ceiling remains intact.
Removing the housing from the ceiling
To remove the housing from the ceiling and access the recessed light fixture for replacement or maintenance, start by turning off the power supply to the fixture. Locate the housing inside the ceiling and remove any screws or clips securing it in place.
Slowly and carefully, pull the housing down from the ceiling while supporting the weight.
Inspect the wiring and connections inside the housing to ensure it’s safe to disconnect. If necessary, label the wires to remember how to reconnect them later, then disconnect them.
After all wires are detached, remove the housing completely from the ceiling.
Ensuring no damage to the ceiling
It’s important to take precautions to avoid damaging the ceiling during the removal process. Use a flathead screwdriver or a small pry bar to gently separate the housing from the ceiling material, taking care not to apply too much force.
To ensure a smooth removal, slowly and evenly ease the housing away from the ceiling, avoiding any abrupt movements. If there are any stubborn spots, try loosening them with a gentle back-and-forth motion.
Be diligent in checking for any signs of damage during and after the housing removal to ensure the ceiling remains intact.
Checking for Damage
Inspecting the ceiling for any damage
When removing recessed ceiling lights, it’s crucial to inspect the ceiling for any possible damage. Start by checking the area around the light fixture for any signs of water damage.
Look for water stains, discoloration, or warping of the ceiling material, as these are indicative of water infiltration. Additionally, keep an eye out for cracks, peeling paint, or visible mold growth, which are all red flags for potential ceiling damage.
Signs of Water Damage
Inspect the ceiling for signs of water damage, such as discolored patches, sagging areas, or the presence of mold or mildew. Water stains on the ceiling can be an alarming indication of a leak, which may require professional attention to address the underlying cause.
It’s essential to thoroughly examine the entire ceiling surface to ensure that no hidden damage goes unnoticed.
Detecting Structural Issues
In addition to visible water damage, check for any structural issues that could compromise the integrity of the ceiling. Look for cracks, bulges, or irregularities that may suggest underlying structural damage.
Identifying these concerns early on can prevent potential hazards and ensure the safety of the installation process for the new light fixture.
Assessing Electrical Components
As part of the inspection process, it’s crucial to assess the condition of the electrical components within the ceiling. Ensure that the wiring and electrical connections associated with the recessed lighting are in proper working condition and free of any damage.
Any signs of wear, fraying, or exposed wires should be promptly addressed by a qualified electrician before proceeding with the installation.
Preparing for the Installation of a New Fixture
Once the inspection is complete and any necessary repairs or remediation have been carried out, it’s time to prepare for the installation of the new light fixture. Begin by clearing the area around the recessed ceiling light to create a safe and accessible workspace for the installation process.
Clearing Debris and Obstructions
Remove any debris, dust, or obstructions from the area surrounding the recessed light fixture. This ensures a clean and clutter-free environment for working on the installation.
Equally important is to clear away any existing insulation material that may impede the installation process or pose a fire hazard.
Shutting Off the Power Supply
Before proceeding with the installation, it’s essential to turn off the power supply connected to the recessed light fixture. This can typically be achieved by switching off the circuit breaker or removing the corresponding fuse.
Confirm that the power is indeed off by using a voltage tester to ensure a safe working environment.
Gathering Necessary Tools and Materials
Prepare all the essential tools and materials needed for the installation, including the new light fixture, electrical wiring, wire connectors, a screwdriver, and any additional hardware. Having everything readily available will streamline the installation process and minimize disruptions or delays.
Securing the Workspace
Prior to installing the new light fixture, secure the workspace by ensuring stable and safe access to the ceiling area. Use a sturdy ladder or scaffolding to reach the installation site, and enlist assistance if necessary to handle the fixture and complete the installation with precision.
Final Checks and Preparations
Before commencing the installation, perform a final check to confirm that all necessary preparatory steps have been completed. This includes verifying the compatibility of the new light fixture with the existing electrical wiring and ensuring that all safety precautions have been taken into account.


