Check out this Youtube video: “HOW TO REMOVE AND REPLACE A RECESSED LED” for step-by-step instructions on how to change built-in ceiling lights and upgrade your lighting fixtures.

Contents
- 1 Understanding Built-In Ceiling Lights
- 2 How to Change Built-In Ceiling Lights
- 3 Common Mistakes When Changing Built-In Ceiling Lights
- 4 Question: What are the safety precautions to take when changing built-in ceiling lights?
- 4.1 1. Turn Off the Power
- 4.2 2. Verify the Power
- 4.3 3. Use Proper Tools and Equipment
- 4.4 4. Secure the Ladder
- 4.5 5. Work with a Buddy
- 4.6 6. Mind the Weight Limits
- 4.7 7. Follow Manufacturer Guidelines
- 4.8 8. Inspect for Loose Wires
- 4.9 9. Seek Professional Help if Uncertain
- 4.10 10. Test the New Fixture
- 5 Safety Precautions
- 6 Frequently Asked Questions
Understanding Built-In Ceiling Lights
Built-in ceiling lights, also known as recessed lights or can lights, are fixtures installed into the ceiling to provide a seamless and elegant lighting solution for various spaces. They come in various sizes, shapes, and designs to cater to different interior design styles and lighting needs, making them suitable for residential, commercial, and outdoor settings. Built-in ceiling lights offer a versatile and customizable lighting option, creating a clean and unobtrusive look in the ceiling while providing focused and directed illumination without occupying physical space.
Definition of built-in ceiling lights
Built-in ceiling lights, also known as recessed lights or can lights, are fixtures that are installed into the ceiling, providing an elegant and seamless lighting solution for various spaces. These lights are designed to sit flush with the ceiling, offering a minimalist and contemporary aesthetic.
They offer a versatile lighting option, suitable for residential, commercial, and even outdoor settings.
Built-in ceiling lights come in various sizes, shapes, and designs to cater to different interior design styles and lighting needs. They are typically installed using a trim and a housing, which provides a secure mounting for the light fixture.
These lights create a clean and unobtrusive look in the ceiling, eliminating the need for bulky and obtrusive lighting fixtures.
One key characteristic of built-in ceiling lights is their ability to provide focused and directed illumination without occupying physical space, making them an ideal choice for areas with low ceilings or spaces where traditional pendant or chandelier lighting might be impractical.
Types of built-in ceiling lights
Recessed Downlights:
Recessed downlights, commonly referred to as can lights, are the most popular type of built-in ceiling lights. They are installed directly into the ceiling and provide a concentrated light source, making them ideal for task lighting, accentuating specific areas, or overall ambient lighting.
Adjustable Recessed Lights:
These versatile built-in lights allow for the adjustment of the direction of the light beam, providing the flexibility to illuminate different areas within a space. They are particularly effective for highlighting artwork or architectural features while offering customization for various lighting needs.
Integrated LED Fixtures:
Integrated LED built-in ceiling lights feature a permanent light source, eliminating the hassle of bulb replacement. They are energy-efficient, long-lasting, and offer a sleek, modern aesthetic.
These fixtures often come with dimming capabilities, allowing for mood lighting and energy conservation.
Multi-Head Recessed Lights:
This type of built-in ceiling light consists of multiple light sources within a single fixture, providing enhanced illumination over a larger area. They are frequently used in larger spaces or areas where uniform lighting distribution is required, such as kitchens, living rooms, or commercial settings.
Decorative Recessed Lights:
Built-in ceiling lights also include decorative options that offer a blend of functionality and visual appeal. These fixtures feature unique designs, finishes, and ornamental details to complement the interior décor while providing efficient lighting solutions.
Built-in ceiling lights offer a seamless and customizable lighting solution, catering to a diverse range of interior designs, and providing targeted illumination for enhanced functionality and aesthetics.
How to Change Built-In Ceiling Lights
Step 1: Gather the necessary tools and materials
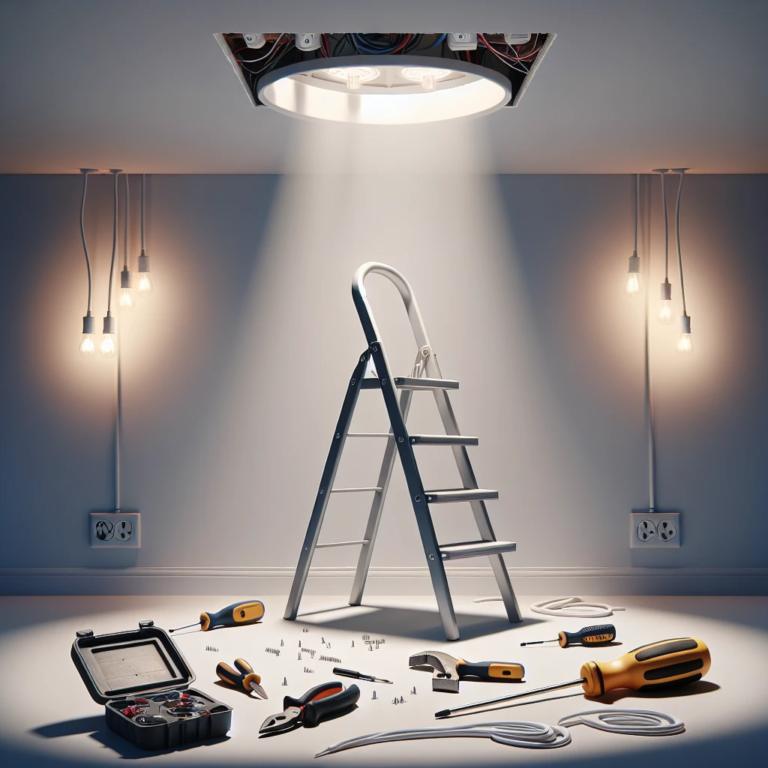
To successfully change built-in ceiling lights, you’ll need some essential tools and materials. You can’t afford to proceed without the following items
-
Non-contact voltage tester
-
Needle-nose pliers
-
Wire stripper/cutter
-
4-in-1 screwdriver
-
Pliers
-
Stepladder
Step 2: Turn off the power to the lights
Turning off the power supply is crucial for safety. Without interruption to the power supply, the risk of electrical accidents is significantly heightened.
Head to your breaker box and shut down the power to the room. Additionally, use a voltage tester to guarantee that the power is indeed Off.
Step 3: Remove the old light fixture
Before uninstalling the old light fixture, it’s vital to ensure that the electricity is completely turned off. Use a non-contact voltage tester to verify that there is no electrical current. Then, unscrew and gently lower the old fixture, being cautious not to damage the wiring.
Step 4: Install the new light fixture
Installing the new light fixture involves carefully connecting the wires. Beginning with the ground wire, use wire connectors to secure each connection.
Then, attach the fixture to the ceiling and ensure it is firmly in place. Make sure to follow the specific installation guidelines provided with the fixture.
Step 5: Turn the power back on and test the new light
After the installation, reinstate the power supply to the ceiling lights. Carefully test the new light fixture to confirm that it is functioning correctly.
If there are issues, double-check the wiring connections and consult the installation manual for troubleshooting guidance.
Common Mistakes When Changing Built-In Ceiling Lights
When changing a built-in ceiling light, it’s common to make a few mistakes that can lead to safety hazards and functionality issues. Yes, some of these mistakes include not turning off the power before starting the process, using the wrong size or type of fixture, and forgetting to test the new light before fully installing it. To avoid these mistakes, always turn off the power, ensure proper measurements for the replacement fixture, and test the new light before completing the installation to ensure a safe and functional outcome.
Not turning off the power before starting the process
It’s crucial to turn off the power before attempting to change a built-in ceiling light. Failing to do so can lead to electrical shock or damage to the fixture.
To ensure safety, use a voltage tester to confirm that the power is indeed off before proceeding with any work.
Using the wrong size or type of light fixture
Selecting the wrong size or type of light fixture can result in an improper fit and functionality issues. Prior to purchase, ascertain the correct dimensions of the existing fixture and ensure that the replacement aligns with these specifications.
Additionally, consider the type of fixture, whether it’s recessed, pendant, or chandelier, to guarantee a seamless installation.
Forgetting to test the new light before fully installing it
Before completing the installation, it’s essential to test the new light fixture to verify its functionality. Connect the fixture temporarily and test its operation to identify and address any potential issues or defects.
This step helps prevent the need to disassemble and reinstall the fixture in case of malfunctions.
Question: What are the safety precautions to take when changing built-in ceiling lights?
When it comes to changing built-in ceiling lights, safety should be the top priority. Here are some crucial safety precautions to consider before diving into the task.
1. Turn Off the Power
Before starting any work on the ceiling lights, ensure to turn off the power to the light fixture at the breaker box. This simple yet crucial step helps prevent any electrical mishaps while working on the lights.
2. Verify the Power
After turning off the power, use a circuit tester or voltage detector to check if the power is indeed off. This extra precaution ensures that there’s no residual electrical current flowing to the fixture, safeguarding against potential shocks.
3. Use Proper Tools and Equipment
Make sure to have the necessary tools on hand, including a wire cutter/stripper, screwdriver, work light, and safety glasses. Using the right tools for the job minimizes the risk of accidents and ensures a smooth installation process.
4. Secure the Ladder
If a ladder is required for accessing the ceiling fixture, ensure it is stable and securely positioned. Avoid balancing on chairs or other unstable surfaces, as falling from a height can lead to serious injuries.
5. Work with a Buddy
Having a second person to assist during the light fixture replacement can greatly enhance safety. They can help hold the ladder, pass tools, or provide support as needed, reducing the risk of accidents.
6. Mind the Weight Limits
When working with recessed lighting or heavy fixtures, be mindful of the ceiling’s weight-bearing capacity. Exceeding this limit can result in structural damage or even the ceiling collapsing, posing a significant safety hazard.
7. Follow Manufacturer Guidelines
Always adhere to the instructions provided by the light fixture manufacturer. Following proper installation procedures and recommended safety precautions specified in the manual is crucial for a secure and reliable lighting setup.
8. Inspect for Loose Wires
Before installing the new ceiling light, carefully inspect for any loose wires or damaged connections. Addressing these issues beforehand ensures a safe and proper electrical installation.
9. Seek Professional Help if Uncertain
If uncertain or uncomfortable with the task of changing the ceiling lights, seeking the assistance of a qualified electrician is highly recommended. Electrical work can be hazardous, and it’s essential to prioritize personal safety.
10. Test the New Fixture
After installing the new ceiling light, perform a final check to ensure all connections are secure and the fixture is functioning correctly. This last step guarantees a safe and functional lighting setup in your home.
By meticulously observing these safety precautions, individuals can change built-in ceiling lights with confidence, ensuring a secure and incident-free installation process.
Safety Precautions
Make sure the power is turned off at the circuit breaker Before you begin the process of changing built-in ceiling lights, it is crucial to ensure that the power is completely turned off at the circuit breaker. This step is essential for your safety and to prevent any potential electrical hazards.
Use a voltage tester to double-check that the power is off After turning off the power at the circuit breaker, it is highly advisable to use a voltage tester to double-check that the power is indeed off. This additional measure provides a crucial layer of safety and ensures that you can work on the ceiling lights without the risk of electric shock.
Avoid working alone, in case of accidents or emergencies It is always recommended to avoid working alone when dealing with electrical components such as built-in ceiling lights. Having a trusted companion nearby can be immensely helpful in the event of unforeseen accidents or emergencies. Their presence can provide timely assistance and support if the need arises.
Remember, following these safety precautions diligently is essential to ensure a safe and successful process of changing built-in ceiling lights.
Replacing built-in ceiling lights may seem daunting, but with the right guidance, it can be a manageable task. Remember that safety should always be a top priority and seeking professional assistance if uncertain is always a wise decision.
By following the outlined steps and adhering to safety guidelines, anyone can successfully change built-in ceiling lights and illuminate their space with ease.
Recap of the steps to change built-in ceiling lights
To begin the process of replacing built-in ceiling lights, first, turn off the power source to the existing light fixture to ensure safety. Then, carefully remove the existing light fixture by twisting and pulling it out of the ceiling or wall.
After that, detach the electrical connections and remove the fixture. Proceed by installing the new light fixture, making sure to connect the electrical components securely before securing the new fixture into place.
Finally, restore the power and test the new lights to ensure they are functioning correctly.
Importance of following safety guidelines
When changing built-in ceiling lights, it is crucial to prioritize safety at all times. Never attempt to work on electrical fixtures without cutting off the power source first.
Additionally, always use insulated tools and wear protective gear, such as gloves and safety goggles. Furthermore, if the process seems complex or challenging, seek professional help to avoid any potential hazards.
Encouragement to seek professional help if unsure about the process
If uncertainty arises during the process of changing built-in ceiling lights, do not hesitate to contact a professional electrician. Professional assistance guarantees a secure and precise installation, ensuring the safety and functionality of the new ceiling lights.
While DIY projects can be fulfilling, safety should always be the primary concern, and seeking expert guidance is a commendable choice when in doubt.


