Check out this Youtube video: “How To Replace A Ceiling Light | LED Light Fixture – YouTube” for an easy and informative tutorial on how to change LED ceiling lights.

Contents
Understanding LED Ceiling Lights
LED ceiling lights are innovative lighting fixtures that use Light Emitting Diodes (LEDs) as their primary light source. They are designed to be installed directly into the ceiling, providing efficient illumination with their integrated LED technology. LED ceiling lights offer a range of brightness levels and color temperatures, while also being energy-efficient and durable, making them a cost-effective and sustainable lighting solution.
Definition of LED ceiling lights
LED ceiling lights are innovative lighting fixtures that use Light Emitting Diodes (LEDs) as their primary light source. These lights are designed to be installed directly into the ceiling, providing efficient illumination with their integrated LED technology.
LED ceiling lights have become increasingly popular due to their versatility and energy efficiency. They offer a range of brightness levels and color temperatures, allowing users to customize the lighting to suit their specific needs.
Furthermore, these lights often come in sleek and modern designs, adding aesthetic appeal to any space.
Benefits of using LED ceiling lights
The benefits of using LED ceiling lights are abundant. Not only are they energy-efficient, consuming up to 90% less energy than traditional incandescent bulbs, but they also have a significantly longer lifespan, reducing the frequency of replacements.
Additionally, LED ceiling lights produce minimal heat, contributing to a cooler and more comfortable environment.
Furthermore, LED ceiling lights offer enhanced durability and require minimal maintenance, making them a cost-effective lighting solution in the long run. They also contribute to environmental sustainability by reducing energy consumption and carbon emissions.
Statistics on the energy-saving benefits of LED lights
Statistics consistently demonstrate the substantial energy-saving benefits of LED lights. Recent analyses reveal that LED lights boast an estimated energy efficiency of 80-90% when compared to traditional lighting technologies.
This significant improvement in energy efficiency not only reduces electricity costs for consumers but also contributes to a greener and more sustainable planet.
How to Change LED Ceiling Lights
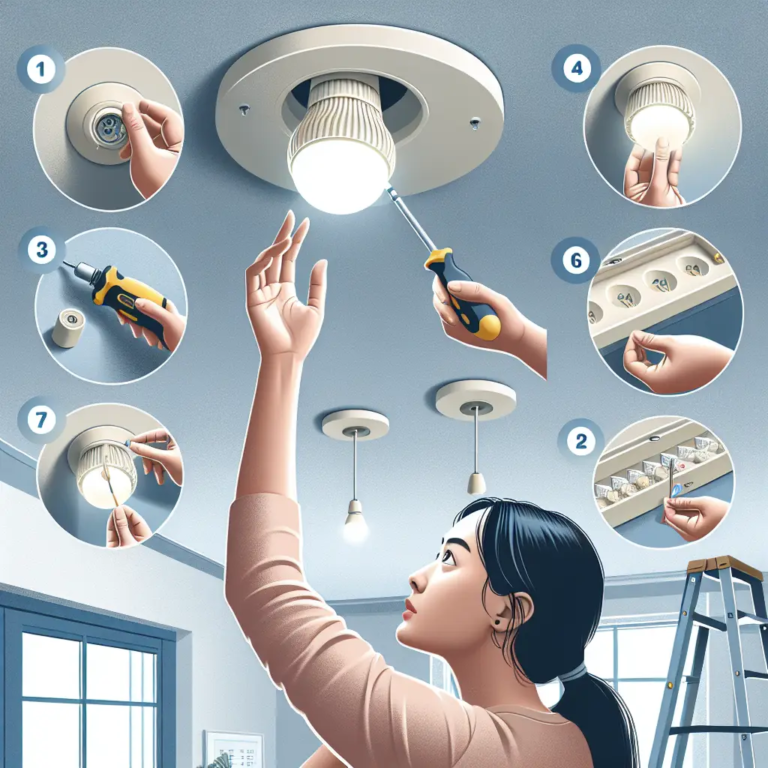
When it comes to changing LED ceiling lights, safety and precision are key. Here are the steps to safely remove the old LED ceiling lights and then the procedures for installing and replacing LED ceiling lights:
Steps to safely remove the old LED ceiling lights
- Turn Off Power: Initially, turn off the power supply to the existing LED ceiling lights at the main electrical panel to ensure safety during the removal process.
- Remove Trim: Use a flathead screwdriver to carefully remove the trim of the existing LED ceiling lights by prying it away from the ceiling.
- Disconnect Wires: Once the trim is removed, disconnect the wires connected to the LED fixture, ensuring that all wires are labeled for easy reconnection later.
- Unscrew Base: After disconnecting the wires, unscrew the base of the existing LED ceiling lights and carefully remove it from the ceiling.
Procedures for installing and replacing LED ceiling lights
- Select the New Fixture: Choose a suitable replacement LED ceiling light fixture that matches the dimensions and wiring of the old one for a seamless installation.
- Connect Wires: Begin the installation by connecting the wires from the new LED ceiling light fixture to the corresponding wires in the electrical box, ensuring a secure and proper connection.
- Secure the Fixture: Once the wires are connected, position the new LED ceiling light fixture against the ceiling and secure it in place using the provided hardware.
- Attach Trim: Finally, attach the trim of the new LED ceiling light fixture, following the manufacturer’s instructions for a polished finish.
Tips for choosing the right replacement LED ceiling lights
- Consider Fixture Type: Determine whether a flush-mount, semi-flush, or pendant LED ceiling light fixture best suits the desired aesthetic and space.
- Measure Dimensions: Take precise measurements of the existing fixture to ensure the new LED ceiling light matches the dimensions and sits flush against the ceiling.
- Evaluate Brightness and Color: Choose an LED ceiling light with the appropriate brightness (lumens) and color temperature (e.g., soft white, daylight) to suit the room’s ambiance.
- Energy Efficiency: Opt for energy-efficient LED ceiling lights with a high CRI (Color Rendering Index) to enhance the quality of light and reduce energy consumption.
By following these comprehensive steps and tips, anyone can safely and effectively change LED ceiling lights, enhancing the ambiance and functionality of their living spaces.
Tools Needed for Changing LED Ceiling Lights
To change LED ceiling lights, you will need the following tools: screwdriver, wire pliers, wire stripper, insulated gloves, and a ladder or step stool. The screwdriver is used to remove and install the new fixture, while wire pliers and wire stripper are crucial for manipulating and cutting wires. Insulated gloves provide protection from electric shock, and a stable ladder or step stool is needed to safely reach the ceiling for the replacement process.
List of tools needed for the replacement process
- Screwdriver
- Wire pliers
- Wire stripper
- Insulated gloves
- Ladder or step stool
Explanation of each tool’s purpose in changing LED ceiling lights
- Screwdriver: A screwdriver is used to remove the screws holding the old fixture in place and to install the new LED ceiling light.
- Wire pliers: Wire pliers are essential for cutting and manipulating wires during the replacement process, ensuring a safe and secure connection.
- Wire stripper: The wire stripper is utilized to cut and strip the insulation from electrical wires, exposing the conductors for proper connection.
- Insulated gloves: Insulated gloves provide protection against electric shock, ensuring safety while handling live wires during the replacement.
- Ladder or step stool: A stable and secure ladder or step stool is necessary to reach the ceiling and safely perform the replacement without any risk of injury.
These tools collectively facilitate a smooth and efficient process for changing LED ceiling lights, ensuring safety and precision throughout the replacement procedure.
Step-by-step Guide for Changing LED Ceiling Lights
To remove the old LED ceiling lights, start by switching off the power supply from the circuit breaker and then carefully detach the old light cover, disconnect the wiring, and unscrew the mounting screws. For installing the replacement LED ceiling lights, check compatibility, secure the mounting bracket, connect the wiring, and attach the light fixture and light cover following the manufacturer’s instructions. After installation, restore power supply, check for proper illumination and any issues, and test the switch functionality to ensure successful replacement. Yes, the installation process should be done with compatibility and safety in mind to ensure a smooth transition to the new LED ceiling lights.
Removing the old LED ceiling lights
To remove the old LED ceiling lights, follow these steps:
- Turn off the power: Begin by switching off the power supply to the existing LED ceiling lights from the circuit breaker to ensure safety.
- Remove the old light cover: Gently detach the cover of the old LED ceiling lights by unscrewing it or unclipping it from the base, depending on the type of fixture.
- Disconnect the wiring: After exposing the wiring, carefully disconnect the electrical connections by unscrewing the wire nuts and separating the wires.
- Unscrew the mounting screws: Finally, use a screwdriver to loosen and remove the mounting screws that secure the old LED ceiling lights to the mounting bracket or housing.
Installing the replacement LED ceiling lights
Now it’s time to install the replacement LED ceiling lights with these simple steps:
- Check compatibility: Before proceeding, ensure that the new LED ceiling lights are compatible with the existing electrical setup and mounting bracket.
- Secure the mounting bracket: Begin by attaching the mounting bracket included with the new LED ceiling lights to the ceiling junction box, following the manufacturer’s instructions.
- Connect the wiring: Next, connect the wiring of the new LED ceiling lights to the electrical wiring in the ceiling, matching the corresponding wires and securing them with wire nuts.
- Attach the light fixture: Carefully position the new LED ceiling lights onto the mounting bracket and secure it in place using the provided screws or locking mechanism.
- Install the light cover: Complete the installation by attaching the cover of the new LED ceiling lights, ensuring a secure and snug fit to the base to complete the installation.
Testing the newly installed LED ceiling lights
After installing the replacement LED ceiling lights, perform a thorough test to ensure proper functionality:
- Restore power supply: Turn the power back on from the circuit breaker and wait for the LED ceiling lights to illuminate, indicating a successful installation.
- Check for proper illumination: Verify that the newly installed LED ceiling lights are glowing evenly and emitting the intended brightness without flickering or dimming.
- Inspect for any issues: Conduct a visual inspection of the newly installed LED ceiling lights to ensure there are no loose connections, unusual sounds, or physical defects.
- Test the switch functionality: Operate the light switch to confirm that the LED ceiling lights respond correctly to the on/off commands, indicating seamless integration with the switch mechanism.
Remember, if you encounter any difficulties or uncertainties during the process, consider seeking professional assistance to ensure a safe and successful LED ceiling lights replacement.
Common Mistakes to Avoid When Changing LED Ceiling Lights
When changing LED ceiling lights, it’s crucial to avoid some common mistakes to ensure a smooth replacement process. One common mistake is not switching off the power before starting the replacement. This oversight can lead to electrical hazards and should be strictly avoided. Another mistake is failing to measure the space accurately before purchasing new LED ceiling lights. This can result in buying fixtures that are either too large or too small for the space, leading to issues during installation.
Furthermore, it’s a frequent mistake to neglect proper wiring during the installation process. This can lead to flickering lights or even potential electrical hazards. Additionally, some individuals make the mistake of not considering the color temperature of the LED lights, which can affect the ambiance and functionality of the space. Lastly, failing to check the compatibility of the LED ceiling lights with existing dimmer switches is another common mistake that can lead to operational issues.
To avoid these mistakes, ensure to turn off the power completely before commencing the replacement. Measure the space accurately to determine the right fixture size, and always consult a professional if unsure. Double-check the wiring to prevent any electrical issues and always consider the color temperature to achieve the desired lighting effect. Lastly, it’s essential to verify compatibility with existing dimmer switches to ensure smooth operation.
Avoiding these common mistakes when changing LED ceiling lights is essential to guarantee a seamless and successful replacement process.


